Quick Links
Quick Links
Quick Links
NOTE: Some items below are only displayed if machine is equipped with the associated option.
|
Setup | Seed is where seed disk and seed selections are made. If your implement is a split-row model, this page is where the wide or narrow rows are enabled for planting. |
Seed Disk |
|
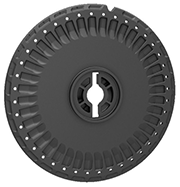
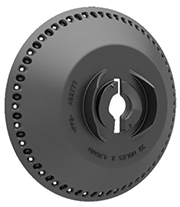
Seed Disk— select to view the available seed disks (bowls) for the selected crop type. |
List Box |
|
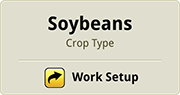
Work Setup— access to choose the crop being planted. |
Work Setup |
|
Holes Per Disk— enter the number of holes that are in your custom seed disk. |
Holes Per Disk |
|
Population Adjust— allows you to adjust the population factor in order to reflect accurate population readings on the bar graph. Population Adjust is changed only when planting high populations. Population Adjust does not change any drive speeds or documentation values. |
Population Adjust |
|
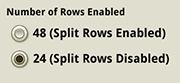
Number of Rows Enabled— determines how many rows are monitored and controlled through the software. |
Number of Rows Enabled |
|
Advanced Settings— access further adjustments and less common settings. |
Advanced Settings |
|
Work Setup |
NOTE: If the crop type chosen is unsupported by your implement configuration, the Custom Seed Disk is automatically selected from the seed disk (bowl) list.
|
List Box |
View the available seed disks (bowls):
|
Selected Crop |
|
All |
NOTE: The seed disks (bowls) that are directly associated to the crop type have the name of the crop type next to the part number.
Select the seed disk (bowl) that you are using with this crop.

Seed Disk (bowl) Selection
NOTE: See your implement Operator's Manual for the seed disk (bowl) recommendations and for the procedure to install the seed disks (bowls).
NOTE: If the disk (bowl) that you want is not in the list, select the Custom Seed Disk.
|
OK
Cancel |
|
Input Box
OK
Cancel |
IMPORTANT: If your planter is a split-row model and the hitch is offset when planting split rows, do not adjust the lateral offset value in the software. The offset value remains zero because the planter rows are recentered when the hitch is moved..
NOTE: The split rows are typically further from the tractor than standard rows. Adjust the Work Point when switching between narrow and wide row spacing.
|
Number of Rows Enabled |
Split Rows Enabled— plant with the narrow row spacing.

Split Rows Enabled
Split Rows Disabled— plant with the wide row spacing.

Split Rows Disabled
|
Setup | Seed is where seed disk (bowl) and seed selections are made. If your implement is a split-row model, this page is where the wide or narrow rows are enabled for planting. |
Seed Disk (bowl) |
|
Seed Disk— select to view the available seed disks (bowls) for the selected crop type. |
List Box |
|
Work Setup— access to choose the crop being planted. |
Work Setup |
|
Holes Per Disk— enter the number of holes that are in your custom seed disk. |
Holes Per Disk |
|
Number of Rows Enabled— determines how many rows are monitored and controlled through the software. |
Number of Rows Enabled |
|
Advanced Settings— access further adjustments and less common settings. |
Advanced Settings |
|
Work Setup |
NOTE: If the crop type chosen is unsupported by your implement configuration, the Custom Seed Disk is automatically selected from the seed disk (bowl) list.
|
List Box |
View the available seed disks (bowls):
|
Selected Crop |
|
All |
NOTE: The seed disks (bowls) that are directly associated to the crop type have the name of the crop type next to the part number.
Select the seed disk (bowl) that you are using with this crop.
Seed Disk (Bowl) Selection
NOTE: See your implement Operator's Manual for the seed disk (bowl) recommendations and for the procedure to install the seed disks (bowls).
NOTE: If the disk (bowl) that you want is not in the list, select the Custom Seed Disk.
|
OK
Cancel |
IMPORTANT: If your planter is a split-row model and the hitch is offset when planting split rows, do not adjust the lateral offset value in the software. The offset value remains zero because the planter rows are recentered when the hitch is moved..
NOTE: The split rows are typically further from the tractor than standard rows. Adjust the Work Point when switching between narrow and wide row spacing.
|
Number of Rows Enabled |
Split Rows Enabled— plant with the narrow row spacing.
Split Rows Enabled
Split Rows Disabled— plant with the wide row spacing.
Split Rows Disabled